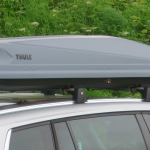
How to Pack a Roof Box
Roof boxes provide extra storage and space when transporting oversized cargo or heading out on adventures. But to make the most of your roof box, you need to know how to properly pack it. Here is a comprehensive guide on packing techniques, weight distribution, security, and more to optimize your roof box storage.
Steps for Packing a Roof Box
Follow these key steps for packing your roof box:
1. Remove the Roof Box Lid
Open the lid or remove it completely during packing for easy access. Setting it off to the side will keep it safe from damage.
2. Load the Heaviest Items First
Place heavy gear like tools, coolers, or bricks in the bottom and center of the box. This helps lower the center of gravity.
3. Distribute Weight Evenly
Fill in empty spaces with lighter items to distribute weight side-to-side and front-to-back evenly. Don’t overload one section.
4. Pack Methodically
Organize items by type, size, or priority. Use dividers or bags to separate categories. Place frequently accessed items on top.
5. Maximize Space
Make the most of every inch by nestling soft goods into gaps between hard objects. Pack Tetris-style.
6. Secure the Contents
Use straps, nets, or non-slip mats to immobilize the load and prevent shifting during transit.
7. Reattach the Lid Properly
Replace the lid and lock it into position. Check that it is mounted correctly before loading onto the roof.
“I like to load my roof box like a game of Tetris, fitting in items securely with no wasted space. A well-packed box makes for much smoother trips!” – Ryan T., outdoor enthusiast
Weight Distribution Tips
Distributing weight appropriately inside your roof box is key for safety and preventing damage. Keep these principles in mind:
- Heavier items lower down
- Even weight side-to-side
- Load centered between roof bars
- Gear secured in position
- Loose items can shift from momentum
Improper weight distribution causes problems like a lopsided box, excessive roof pressure, and handling issues when driving. Take time to pack mindfully and re-evaluate as you load items.
Carrying Capacity Limits
Roof boxes have weight limits set by the manufacturer, usually between 110-165 lbs (50-75 kg). The vehicle’s roof load capacity also comes into play. Exceeding either limit risks damaging your roof box or vehicle roof. Weigh gear on a scale if close to capacity maximums.
| Roof Box Size | Approximate Weight Limit |
|---|---|
| Small | 110 lbs |
| Medium | 130 lbs |
| Large | 165 lbs |
What to Pack in a Roof Box
Roof boxes excel at carrying certain types of oversized or bulky items:
- Skis & snowboards
- Luggage & camping equipment
- Beach/water gear like kayaks
- Tools or construction materials
- Cargo carriers or rooftop bags
Avoid dense, extremely heavy objects that cause pressure points. Also be mindful of height – tall items can make the vehicle top-heavy.

Securing the Roof Box Contents
Use the following methods to immobilize your roof box contents:
- Lashing straps – Tie down loose items with ratchet straps or bungee cords.
- Cargo nets – Suspend and contain items while allowing visibility.
- Non-slip mats – Provide grip between items and box floor.
- Dividers – Partition box sections and prevent shifting.
- Bagging small items – Contain loose gear in duffle bags or storage cubes.
Driving Safely with a Roof Box
Once packed and loaded, keep these safety tips in mind while driving with your roof box:
- Maintain speed limits and avoid sudden acceleration/braking
- Take corners and turns slowly
- Allow extra distance for braking
- Be aware of height clearance with a roof box
- Check strap tightness regularly
- Load within weight limits
Following the guidelines in this article will help ensure your roof box is packed properly. With a bit of practice, you’ll be loading and transporting gear with ease and confidence. Safe travels! Check out our top list of cargo boxes if you’re in need of a new one.