Are you wondering how to repair a damaged roof box and prevent further damage to your home? Roof boxes are an essential part of your home’s structure and protect it against the elements. However, they can sustain damage over time, leading to leaks and other issues. In this article, we will provide a step-by-step guide on how to repair a damaged roof box and prevent further damage to your home.
Repairing Damaged Roof Boxes: A Step-by-Step Guide
By reading this article, you will learn:
– How to identify the extent of the damage to your roof box
– The necessary materials and steps to repair a damaged roof box, including cleaning and patching
– The importance of regular maintenance and when to consult a professional roofing contractor
As a homeowner, it’s important to know how to repair a damaged roof box. A damaged roof box can cause severe damage to your home, such as leaks and mold growth. Repairing a damaged roof box is essential to maintain the integrity of your home and protect it against environmental factors. In this guide, we will provide a step-by-step process on how to repair a damaged roof box and prevent further damage to your home.
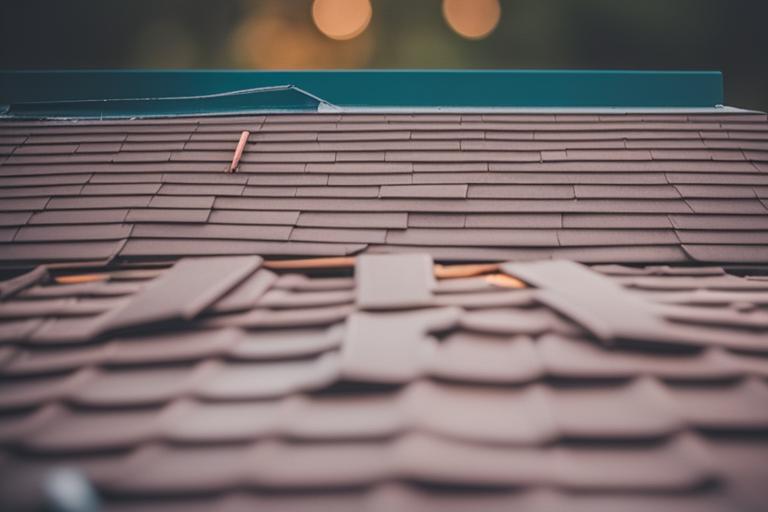
Identifying the Extent of the Damage
The first step in repairing a damaged roof box is to identify the extent of the damage. This will help you determine if the damage can be repaired or if the roof box needs to be replaced entirely. Common types of damage include cracks, holes, and leaks. Inspect the roof box thoroughly and look for visible signs of damage, such as cracks or holes. Check for any signs of water damage on the interior of your home.

Gathering Necessary Materials
Once you identify the extent of the damage, gather the necessary materials to repair the roof box. You will need a patching kit, sandpaper, a putty knife, and a cleaning solution. The patching kit should be specifically designed for roof boxes and include all the necessary materials for the repair.
Cleaning the Damaged Area
Before repairing the damaged area, clean it thoroughly. This will help ensure that the patching material adheres properly to the roof box. Use a cleaning solution to clean the damaged area and remove any debris or loose material.
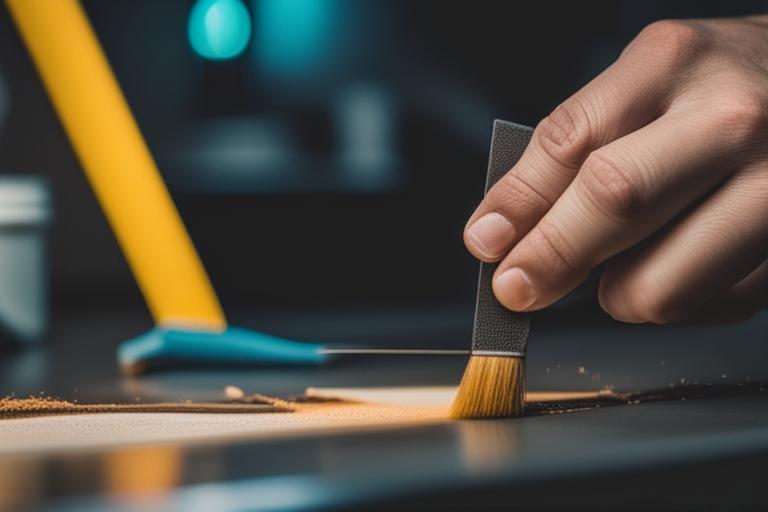
Sanding Down the Damaged Area
After cleaning the damaged area, use sandpaper to sand down the area around the damage. This will create a smooth surface for the patching material to adhere to. Sand down the area around the damage to create a smooth transition between the patched area and the rest of the roof box.
Applying the Patching Kit
Once the area is clean and sanded down, it’s time to apply the patching kit. Follow the manufacturer’s instructions carefully to ensure that the patching material is applied evenly and allowed to dry completely. Apply the patching material in thin layers, and allow each layer to dry completely before applying the next.
Sanding Down the Patched Area
After the patching material has dried completely, use sandpaper to sand down the patched area. This will create a smooth surface that blends in with the rest of the roof box. Sand down the patched area carefully to avoid damaging the surrounding areas.
Applying a Protective Coating
To prevent further damage to the repaired area, apply a protective coating. There are several options for protective coatings, such as clear paint or sealant. Follow the manufacturer’s instructions carefully to apply the protective coating evenly.
Regular Maintenance
Perform regular maintenance on your roof box to prevent future damage and prolong its life. Inspect your roof box twice a year, once in the spring and once in the fall. This should include a thorough inspection, cleaning, and any necessary repairs.
Personal Experience: Identifying and Repairing a Damaged Roof Box
Last winter, a heavy snowstorm hit our town, causing damage to many homes, including ours. One of the most significant damages we noticed was a crack in our roof box. At first, we didn’t think much of it, but we soon realized that it was allowing water to seep into our attic, causing damage to our insulation and ceiling.
We followed the steps outlined in this guide to repair the damaged roof box. First, we identified the extent of the damage and determined that it was repairable. Then, we gathered the necessary materials, including a patching kit, sandpaper, a putty knife, and a cleaning solution.
After cleaning the damaged area thoroughly, we sanded it down and applied the patching kit evenly. We made sure to let it dry completely before sanding it down again to create a smooth surface. Finally, we applied a clear sealant to the patched area to protect it from future damage.
Since then, we have been performing regular maintenance on our roof box, including cleaning and inspecting it for any signs of damage. We learned the hard way that even small cracks can cause significant damage if left unattended.
Overall, we are glad that we were able to repair our damaged roof box on our own, but we also recognize that more severe damage may require professional assistance.
Risks of DIY Repairs
| Type of Protective Coating | Description | Pros | Cons |
|---|---|---|---|
| Clear Paint | A clear paint coating can be applied to the repaired area to protect it from future damage. | Provides a clear protective layer that is invisible | May not provide as much protection as other types of coatings |
| Sealant | A sealant can be applied to the repaired area to protect it from future damage. | Provides a waterproof seal that can prevent leaks | Can be difficult to apply evenly |
While repairing a damaged roof box is possible, it’s important to consider the risks associated with DIY repairs. DIY repairs can be dangerous and lead to further damage or personal injury. If the damage is severe or you’re not comfortable with DIY repairs, consult a professional roofing contractor.
Consulting a Professional
If the damage to your roof box is severe or you’re not comfortable with DIY repairs, consult a professional roofing contractor. A professional can assess the damage and provide recommendations on the best course of action. When choosing a roofing contractor, make sure to research and choose a reputable company with positive reviews.
Conclusion
Repairing a damaged roof box is essential to maintain the integrity of your home and prevent further damage. By following the steps outlined in this guide, you can repair your damaged roof box and prevent further issues. Remember to perform regular maintenance on your roof box to prevent future damage and consult a professional if the damage is severe. By taking these steps, you can ensure that your home is protected against the elements for years to come.
Insider Tip: Use a patching kit specifically designed for roof boxes to ensure a proper repair.
Questions and Answers
Question: Who can repair a damaged roof?
Answer: A professional roofer can repair a damaged roof.
Question: What causes roof damage?
Answer: Roof damage can be caused by weather, age, or poor maintenance.
Question: How do you repair a damaged roof?
Answer: Repair a damaged roof by identifying the problem area, removing damaged material, and replacing it with new material.
Question: Who should I call for roof repair?
Answer: Call a licensed and insured professional roofer for roof repair.
Question: What if my roof is beyond repair?
Answer: If your roof is beyond repair, consider a full roof replacement.
Question: How long does roof repair take?
Answer: The length of time for roof repair depends on the extent of damage, but typically takes 1-3 days.